
Wind damage vs. contractor damage: how to tell the difference on your roof
A creased or lifted shingle looks like a storm did it. Sometimes it did. But wind isn't the only thing that bends shingles. Roofers, gutter crews, HVAC techs, satellite installers, and even inspectors walk on roofs, lift tabs, and kneel in the same spots for hours.
That matters for one big reason: a homeowner's policy covers storm damage, not damage caused by someone working on the roof. If an adjuster finds contractor damage mixed in with your storm photos, they'll carve it out of the claim. Worse, it can make them second-guess the real storm damage too.
Here's how to tell the two apart, using real photos from inspections in Northern Kentucky and Cincinnati.
Why the difference matters
Wind damage is a covered peril under most homeowner's policies. Contractor damage is not. It's the responsibility of whoever caused it, and it's usually handled through that company's liability coverage, not your homeowner's claim.
If you document both together and call it all storm damage, you risk the adjuster discounting your whole claim. If you separate them clearly, the real wind damage stands on its own.
What real wind damage looks like
3-tab shingles
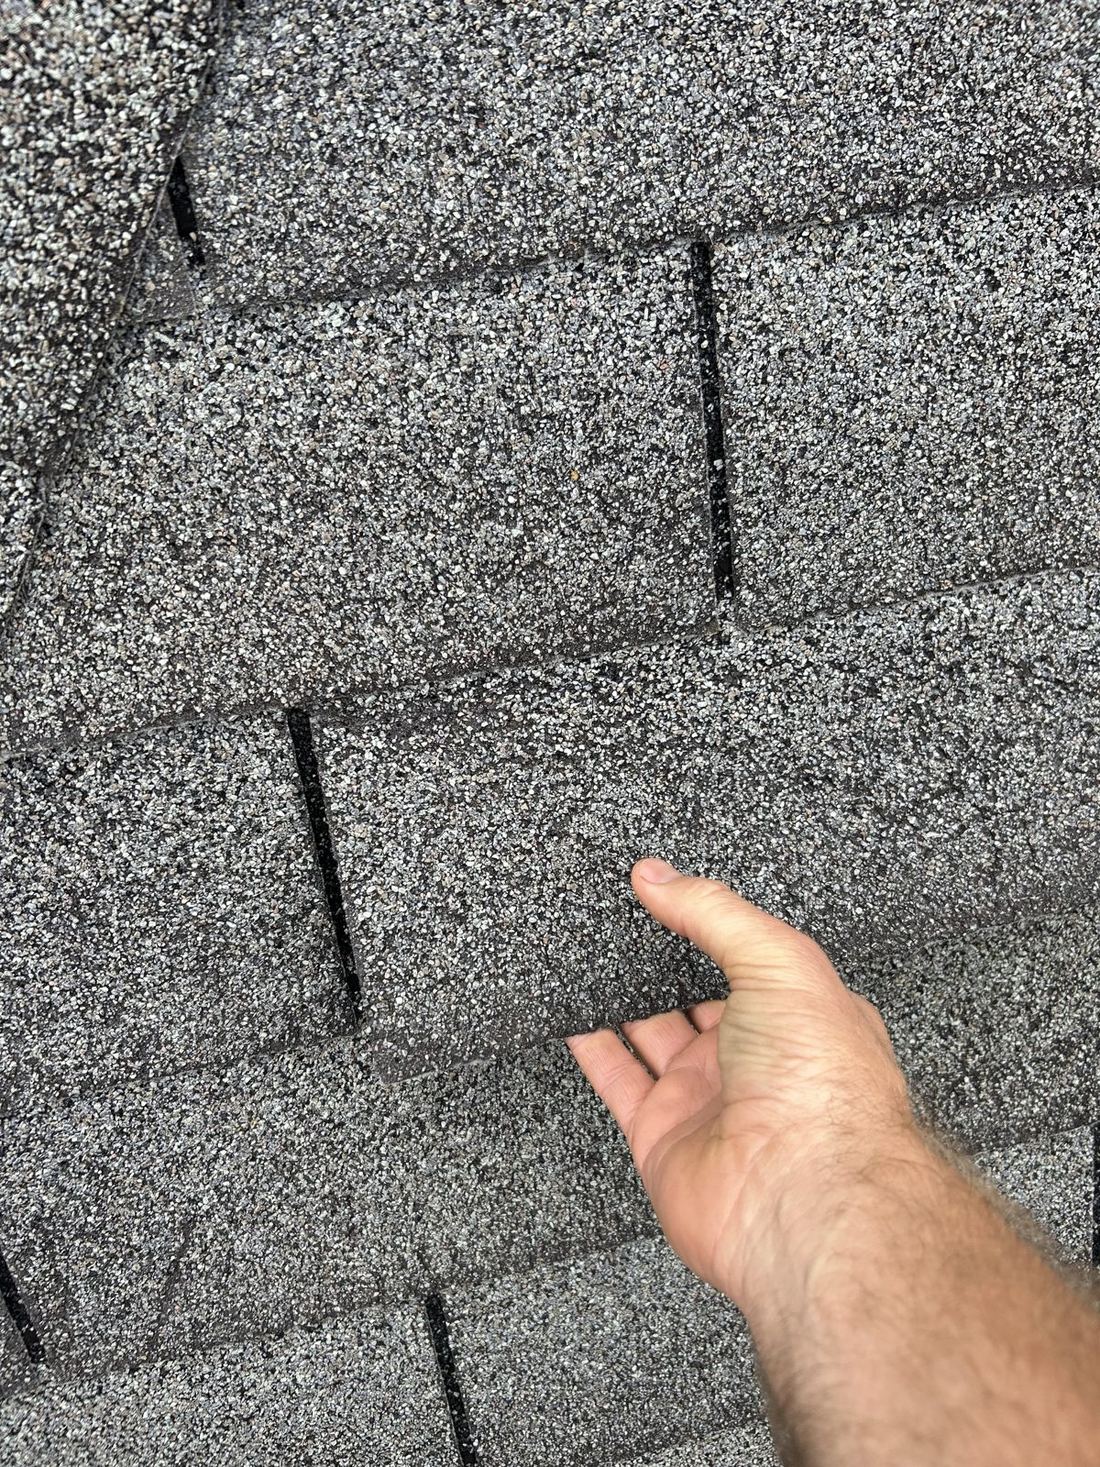
On this 3-tab roof, the tab lifts freely with no resistance. The seal strip that should hold it down has let go. That's the starting point for wind damage, but on its own, an adjuster may call it age or a manufacturing issue. What makes it a wind claim:
- A horizontal crease running straight across the tab, usually near the nail line or the top of the cutouts. Wind lifts the tab and folds it back along that line.
- Torn sealant on the underside. If you see torn asphalt with granules stuck to it, the shingle was sealed and got ripped loose. Clean, shiny asphalt with no transfer suggests it never bonded.
- A pattern. Multiple lifted or creased tabs, concentrated on the slopes facing the storm. Wind follows a direction. Random single tabs don't.
Dimensional (architectural) shingles
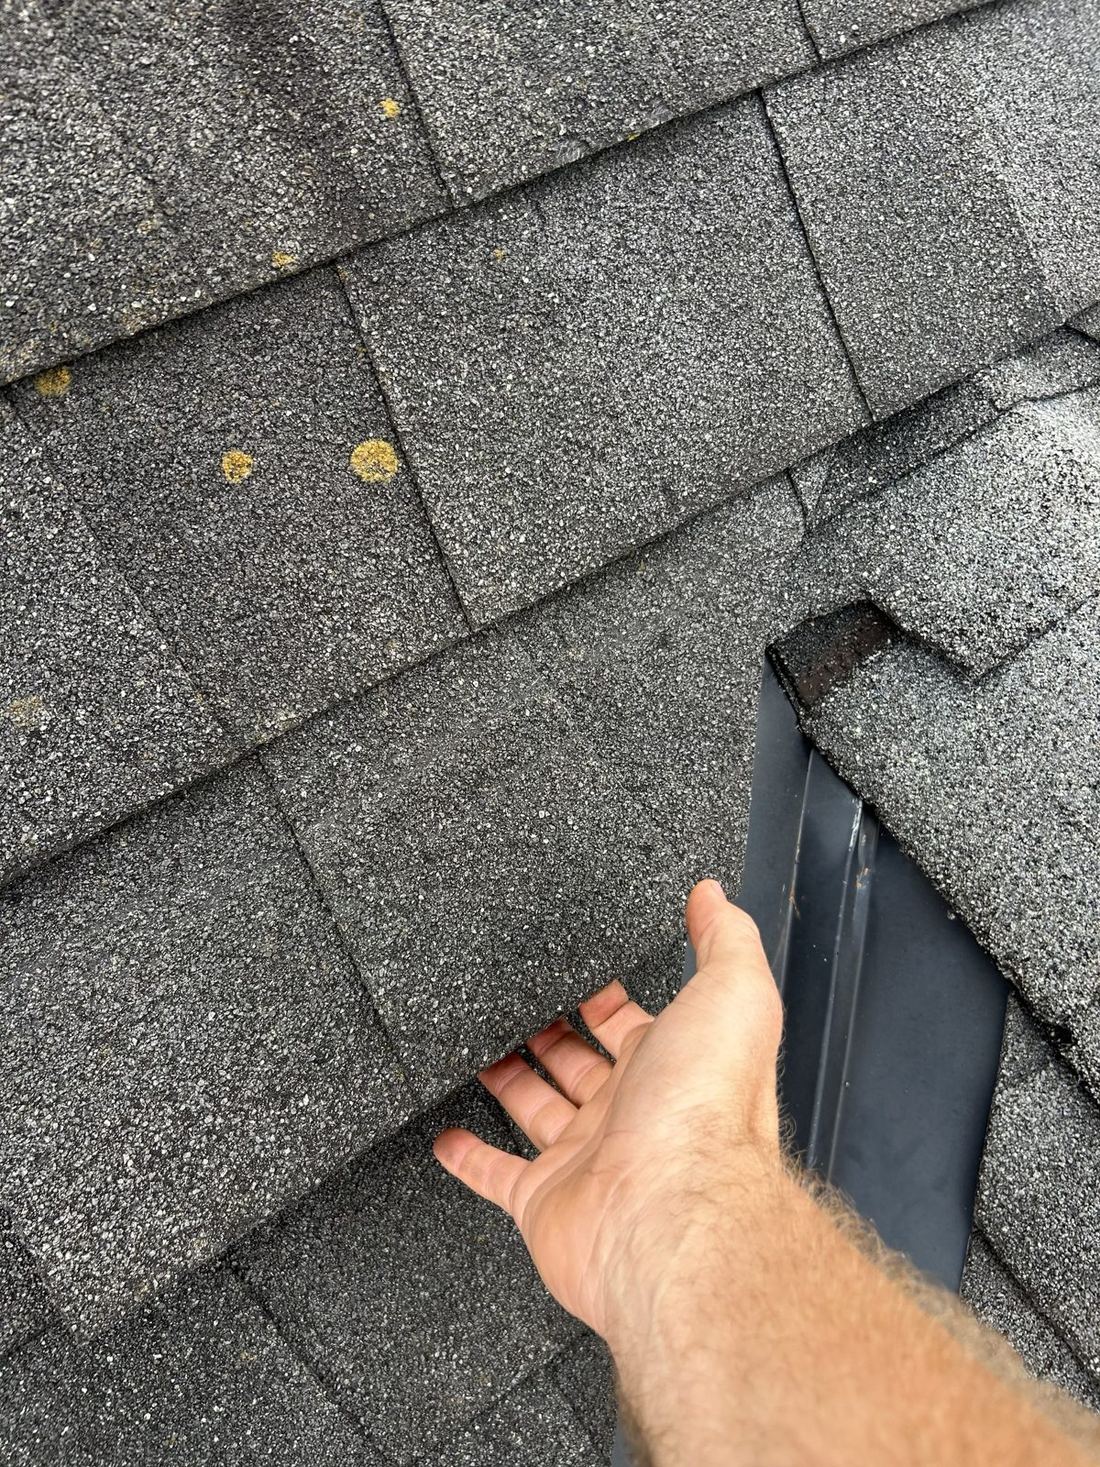
Dimensional shingles are heavier and crease less than 3-tab. Wind damage often shows up as unsealed shingles, nails backed out, or tears at the nail line instead of a clean crease.
This shingle lifted along the cut edge next to a metal valley. Cut edges have no factory seal strip, so wind gets leverage there first. Expect pushback, though: valley edges are supposed to be hand-sealed during installation, and an adjuster may call this an install issue. The fix is showing the same kind of lift out in the open field of the roof, not just at the valley.
What contractor damage looks like
Foot traffic around a work area
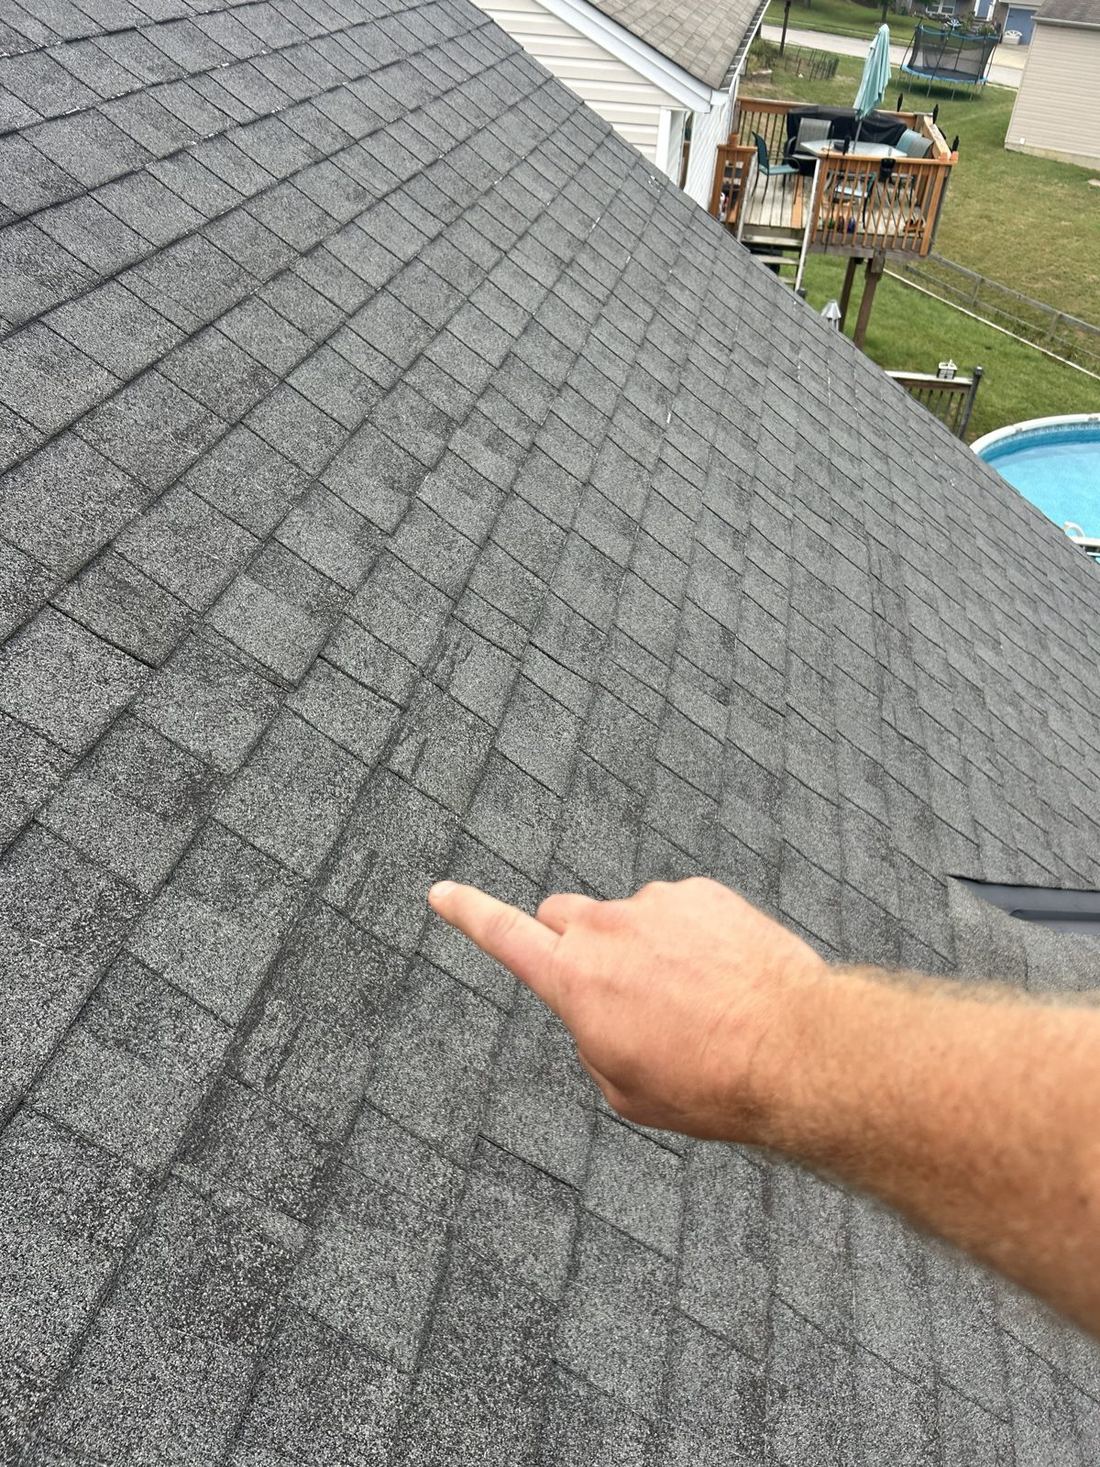
Contractor damage clusters where people work: around vents, satellite dishes, chimneys, HVAC lines, ridge vents, and where the ladder goes up. On this dimensional roof, the scuffed patches sit right next to a vent. Storm damage doesn't care where your vents are. Workers do.
The diagonal scuff
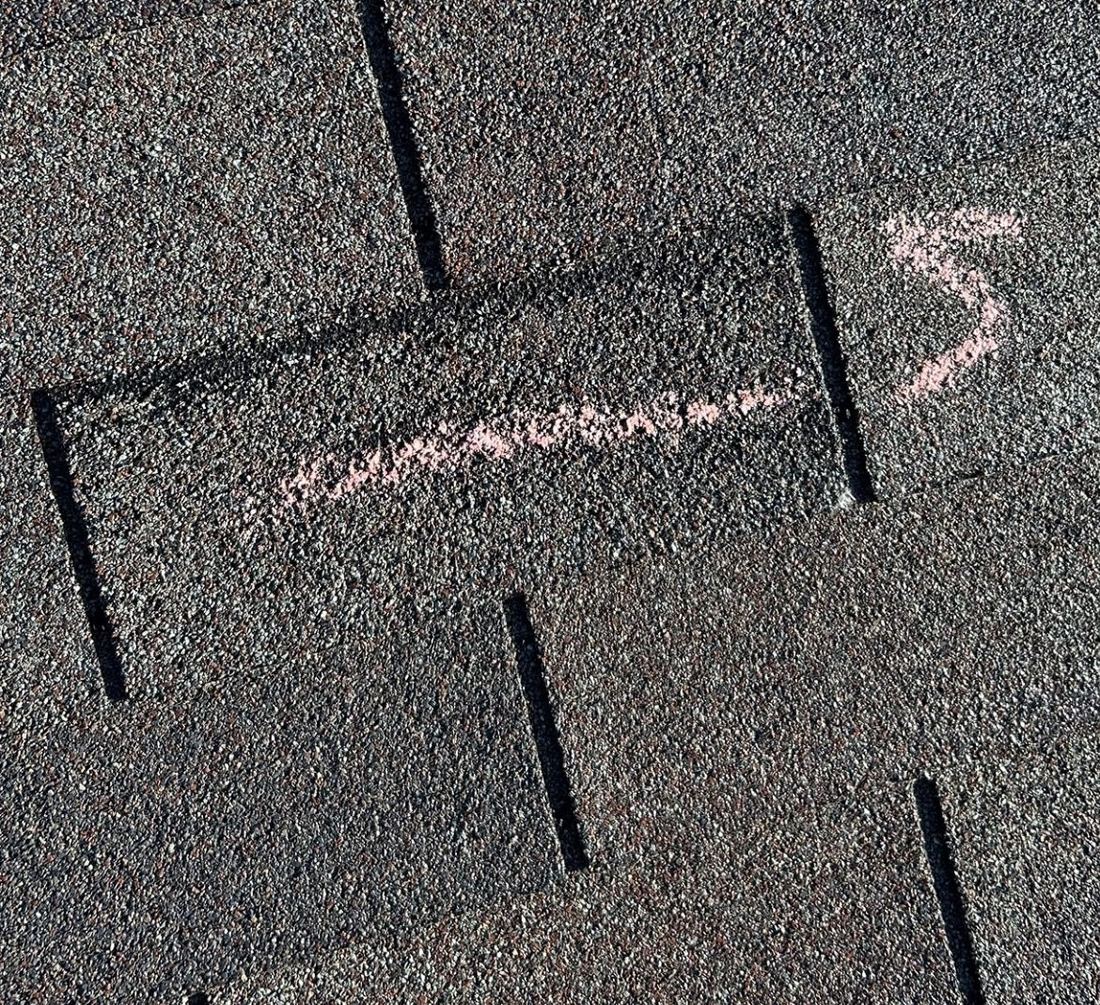
This 3-tab shingle sits one course below the ridge vent, right where an installer kneels while nailing ridge cap. Three things give it away:
- It runs diagonally. Wind creases run straight across the tab. A diagonal mark fits a boot or knee dragging across it.
- The granules are crushed and smeared, not folded. That's pressure plus friction, typical of someone's weight on the shingle.
- It's isolated. One tab, in a work zone, with the surrounding shingles clean.
The corner fold that mimics wind
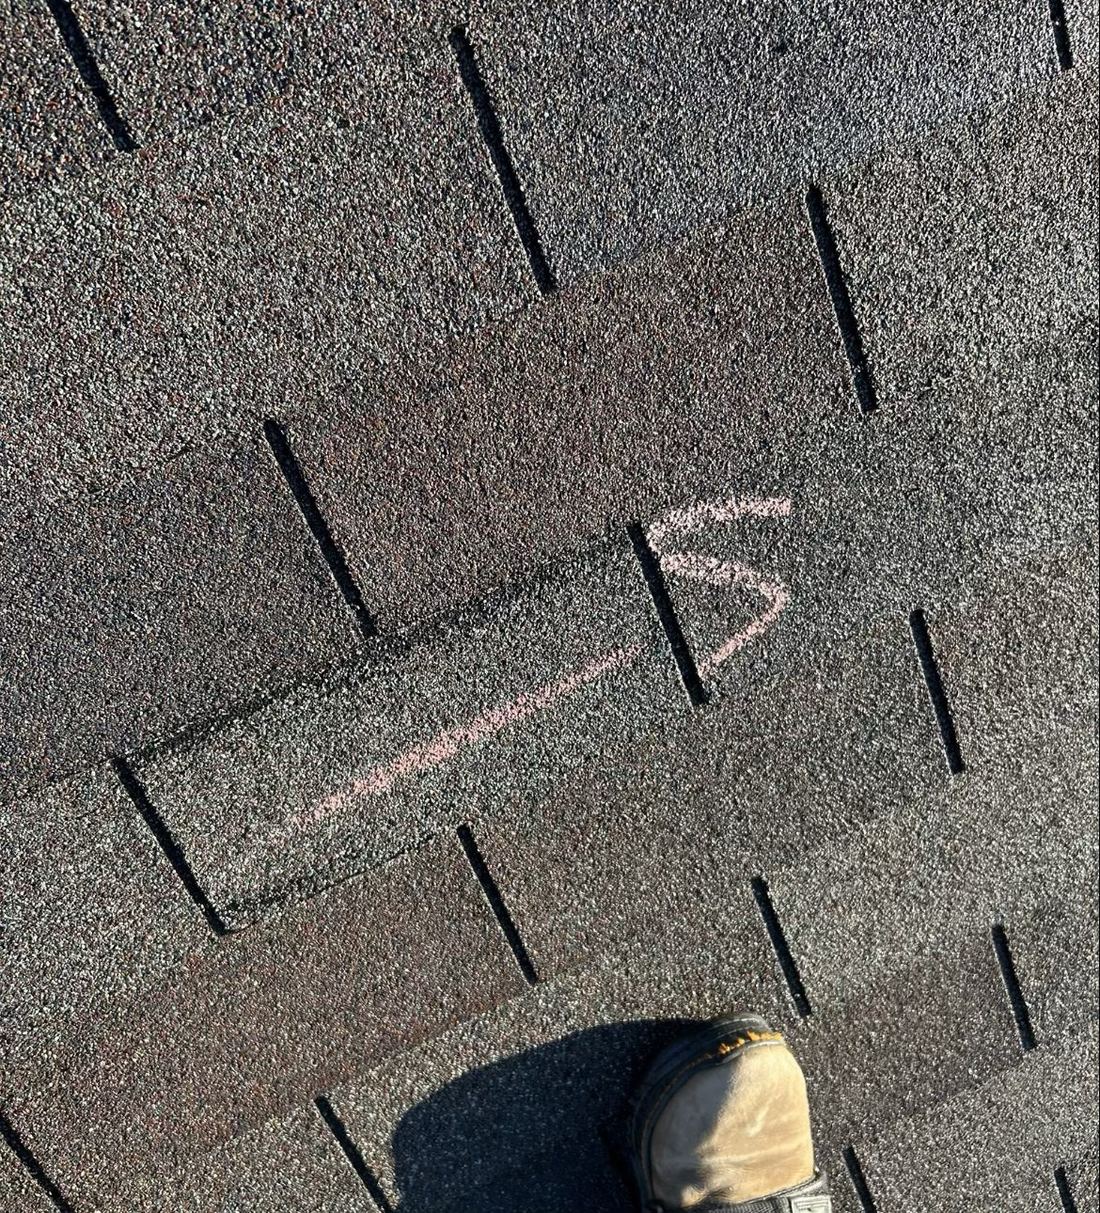
This is the tricky one. The dark line across the top of the tab is a real fold, and the left corner is lifted where the seal broke. On its own, it could pass for a wind crease.
What tips it toward contractor damage:
- The fold starts at the corner. When a worker lifts a tab to reach nails or slide in a replacement shingle, they grab a corner and peel it back. Wind tends to lift and crease more evenly across the full width of the tab.
- It's alone. The tabs on either side are seated and undisturbed. Wind rarely picks one tab in the middle of an otherwise clean section.
- It's in the work zone, on the same section below the ridge vent where the crew was working.
Quick comparison
| Wind damage | Contractor damage | |
|---|---|---|
| Crease direction | Horizontal, across the full tab | Diagonal, or starting at a corner |
| Location | Storm-facing slopes, spread across the field | Near vents, ridge, ladder, dishes, chimneys |
| Pattern | Many tabs, follows wind direction | Isolated tabs or a footpath line |
| Granules | Usually intact along a clean fold | Crushed, smeared, or scuffed |
| Timing | Matches a dated storm | Matches when work was done on the roof |
How to document it the right way
- Take a wide shot and a close-up of every spot. The wide shot shows location (near a vent, on a storm-facing slope). The close-up shows the mark itself.
- Photograph the underside of any lifted shingle. Torn sealant is your best proof a seal was broken by force.
- Shoot the open field, not just edges and valleys. Damage in the field is much harder to blame on installation.
- Note recent work on the roof. If a gutter, satellite, or roofing crew was up there recently, write down when. It helps sort out what came from where.
- Keep the two separate. Submit storm damage as storm damage. Raise contractor damage with the company that did the work.
The bottom line
Not every crease is a claim, and not every crease is a write-off. Direction, location, and pattern tell the story. Wind leaves horizontal creases spread across storm-facing slopes. People leave diagonal scuffs and corner folds right where they were working.
Not sure what you're looking at on your own roof? Get a free roof assessment and see your replacement cost estimate and insurance approval likelihood in minutes. Already know you need a new roof? Request up to five bids from vetted local roofers, with no sales pitch.